Adding Texture to Your Image For Photoshop CS

Adding texture can bring your images to a different level, adding interest, depth, and a bit of artistic quality to them. Photoshop comes preloaded with lots of different textures to choose from, or you can take your own images and use them for textures in much the same way. There are a few different ways to add texture, but I’m just going to show you one way for now.
First, open up the image you want to alter. Resize the image to whatever works for you. If you are printing your image, be sure to size it at 300 dpi to get good overall print quality. I’m working with a stock photo that I popped the color on a bit. I recommend doing all of your exposure and color compensations first, then doing the texture last.
With your image open, go up to the options bar and click on LAYER > NEW FILL LAYER > PATTERN.


Now another pop-up window will open and you will see a pattern placed over the top of your image. Grab the drop-down menu on the left and select the pattern you want to use. I’m choosing canvas which is a default texture that comes preloaded in PhotoShop.

At this point, you can make the pattern bigger or smaller by increasing the percentage on the SCALE section within this same window. I’m just going to leave mine set to the default of 100% and then click OK.
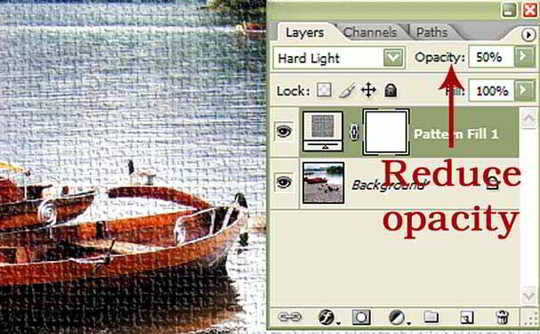
Now you need to go to your layers palette and change the blending mode.

As you can see in the sample above, the texture is very intense. I think it is way too much for my personal taste, so I’m going to reduce the opacity of the Pattern Fill 1 layer to 50%. As you can see, it is much softer looking now.
When you are all done, simply merge the layers together and save it as a new document. Here is my final before and after of this image with the canvas texture. Have fun playing!!

No comments:
Post a Comment